When we bought our house four years ago, we had plenty of space. There were three bedrooms for just the hubby and I, our two year old son, and our fully grown black lab – the lab not taking up a bedroom, only some floor space and the backyard which she was more than happy to call her own.
Fast forward four years and we are now over-capacity. The two year old is now six and has filled up his room with every rock, stick and coin that he can add to his “collections” – and we have welcomed not one, but TWO younger siblings to the household which meant that we promptly ran out of bedrooms in which to store these adorable children and their collections.
During the later months of my most recent pregnancy, I started to worry about who would go where when the baby finally made his debut. Both kiddo bedrooms were taken by the older kiddos, and we all enjoyed our arrangement as it meant that most nights everyone slept soundly in their own beds. But the questions and planning wouldn’t wait for any baby – Would putting the baby into either one of the kiddos rooms upset their sleep pattern and leave not only the mommy exhausted, but immediately add zombie children to the mix? Ugh. We went back and forth and where the baby should go and finally came to the decision that it was time that middle child moved into the oldest child’s room and the baby went into a bedroom all by himself. This also meant that the middle child would be giving up her crib which seemed like perfect timing anyway as she is almost three years old.
So a bunk bed was ordered, built, and installed. Sheets were washed, pillows fluffed, and all the excitement was shared with the two older kiddos to get them on board with the great bedroom-switch-out master plan. Older kiddo was excited about the bunk bed. Middle kiddo was excited about sleeping in the same room as the older kid. Mommy was excited that there would only be one kiddo up in the middle of the night at a time…and then it was go-time!!
Now, think of go-time as this: teeth were brushed, the older kiddo was tucked into the top bunk and the younger kiddo was tucked into the bottom bunk. The baby slept quietly in his bassinet while Mommy read bedtime stories – the older kiddos quietly listening to the story or asking relevant questions until story time was over – and then the kiddos closed their eyes and went straight to sleep.
Sounds so beautiful and picturesque, right?? Well, that didn’t happen at all. Not even once.
So far the only thing that bedtime has included on a consistent basis is the brushing of the kiddo teeth. After that, it’s a mad dash into the bedroom for story time which could include any or all of the following: screaming, yelling, pillows being thrown off the top bunk, crying, wine being poured, a baby not sleeping, threats, discussions about birth control, story time, more tears, and finally, moving the middle child back into her bedroom, and her into her crib that was supposed to be open for the new baby to occupy.
Yeah. So much for planning.
Every night we are at the same stage and unfortunately have not been able to budge the middle child out of her crib and into the bottom bunk of her brothers new and shiny bed. Every night we tuck her into the bottom bunk, read her stories, and sing her songs in her brothers room. We even kiss her goodnight in her brothers room and she tells us goodnight too….then about 15 minutes later, someone yells from the bedroom, “she wants to go to her own room” and off she goes, into her old room and her old crib – with not a care in the world about where her baby brother might need to rest his little head during the night. Siblings – just as I imagined it to be…
In the meantime, let’s think of other things and play with our food. Dinnertime is almost as fun as our bedtime routine and I can guarantee that there is both crying and wine being poured on a nightly basis, and sometimes I have both. But, in an attempt to make healthy and delicious meals to enjoy as a family I’ve really been trying to make one meal that can be adjusted for each eater without trying to hard – like this creamy white bean stew with garlic, rosemary and thyme. The stew itself eats amazingly on it’s own, or you can get creative with it and make something for everyone without going too crazy.
For dinner tonight I took a bowl of the stew and for the middle kiddo I topped hers with some ripe avocado, a squeeze of lime and sprinkling of sea salt (seriously, don’t ask, she will eat almost anything with those toppings on it) – the older kiddo had steamed broccoli, last nights leftover pork tenderloin and some fresh tomatoes over the top of his bowl – and the parentals enjoyed our bowls of white bean stew with some sautéed swiss chard, homemade garlic croutons and all of the parmesan cheese we could pile on top without looking like degenerate cheese-hounds in front of our impressionable children. Ahem.
So what’s the lesson from todays story? You can make your kids bed, but you can’t make them sleep in it!! :/
XO,
Jenn
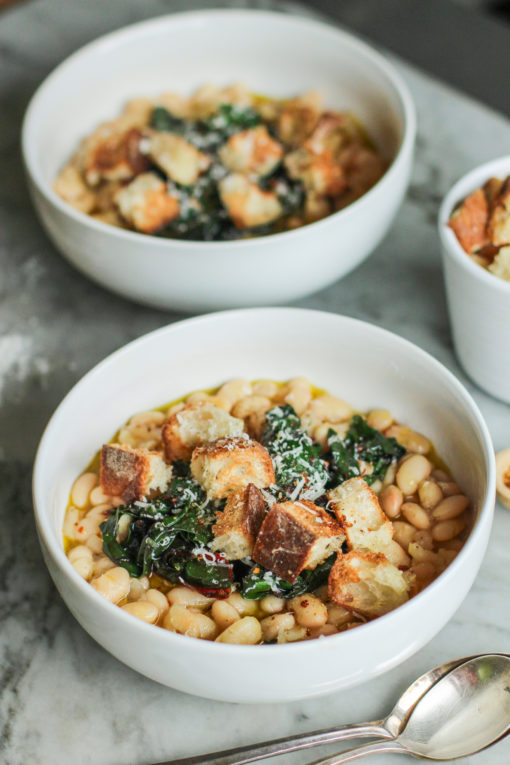 white bean stew with rosemary and thyme
makes 4-6 servings
3 tablespoons olive oil
1/2 cup chopped white onion
3 cloves of garlic, minced
1/2 cup chopped celery
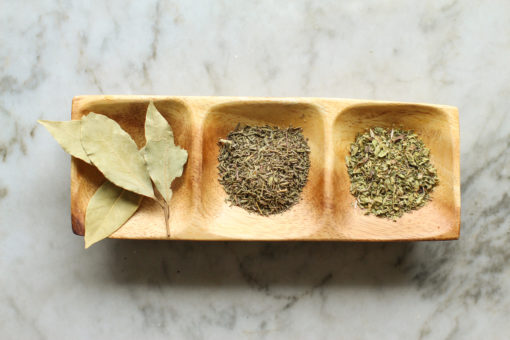
1 teaspoon dried thyme (or 2 teaspoons fresh thyme)
1 teaspoon dried rosemary (or 2 teaspoons minced fresh rosemary)
2 bay leaves
2 cups dried white beans (any type that you like, I used these)
8 cups of vegetable stock or water
salt
black pepper
Place the beans in a large colander and rinse under running water. Place the drained beans into a large bowl and cover completely with water. Place on your counter and soak overnight, allowing the beans to re-hydrate.
Once the beans are ready to be cooked, place a heavy bottomed stock pot over medium heat and add the olive oil, onion, garlic and celery to the pot. Cook the vegetables in the oil until they become soft, stirring occasionally, about five minutes. Add the thyme, rosemary and bay leaves to the pot, along with the beans and the stock. Turn the heat up and bring the stock to a boil, then turn the heat to medium-low, cover the pot, and simmer until the beans are soft and cooked completely (cooking time will vary depending on the type of beans you use.)
Once the beans are cooked, remove them from the heat. Using a potato masher or a handheld blending stick (like this one), slightly mash up some of the beans so the stew becomes creamy and thick. Add salt and pepper to taste and serve immediately.








Leave a Reply